3D Image Processing Functions
Image Rotate: You can use this command to rotate an image at a user defined angle
Reconstruction: 3D-DOCTOR uses a back-projection algorithm to reconstruct a volume image from a series of images taken at regular angle intervals.
Negate: You can use this command to reverse the image pixel intensity values. This command is used when am image is scanned with reverse polarity.
Despeckle: This command is used to remove white and black noise pixels from a monochrome or binary image. Other image types should be converted to binary or monochrome first if you want to use the despeckle command
Smooth: You can smooth your image using either the Median Filter or Average Filter options.
Remove Background: This command employs a specially developed image filter that automatically removes dark image background from either 8-bit or 16-bit grayscale images.
Edge Detection: You can create an edge-enhanced image from your original image using either the Sobel Edge detector or the Gradient Magnitude detector.
Image/Conversion: You can convert your images between a variety of image types, including 24-bit RGB image, 8-bit palette color image, 16-bit and 8-bit grayscale image, and 1-bit bi-level image.
Image/Mosaic: This command is used to create an image mosaic from multiple images or images with multiple planes. Images with overlapped borders are correlated to create seamless image mosaic.
Image ReSlicing
- Image Reslice: You can reslice an image that has uneven spacing/thickness between slices to create an image with evenly spaced slices for more accurate 3D rendering and analysis.
- Reslice Volume: You can reslice a CT/MRI image along an arbitrary axis in 3D space. Simply define the 3D angle and a new image is created.
Image Registration and Fusion
- Registration: Register an image against another image to make the two images in the same orientation and dimension. This can be done by defining 4 or more control points among all image slices. You can then compare them pixel by pixel or fuse them together to create a new fusion image. Analysis of multi-modality images is now an easy thing to do with 3D-DOCTOR.
- Image Fusion/Focus Fusion: You can take a group of microscopy images acquired at different focus and use 3D-DOCTOR's Focus Fusion function to stitch them all together to create a single image with full focus everywhere in the image.
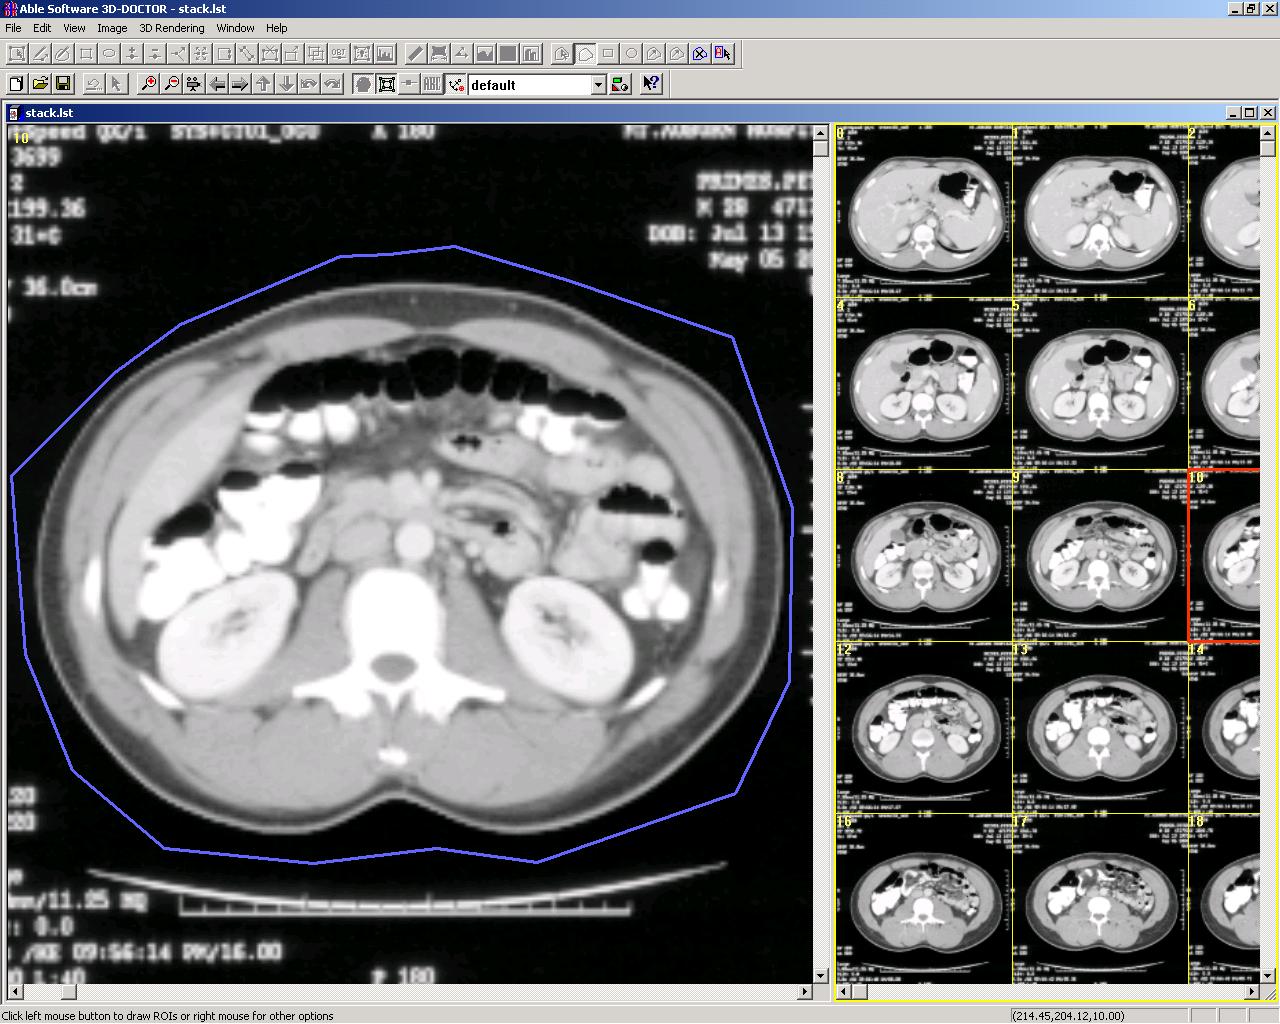
CRop Image Using Regions of Interest (ROI)
Image slices can be cropped with user-defined region of interest (ROI) to remove unwanted portions and clean printed text on a film image.
Original Image and a region of interest (ROI) defined (blue polygon):
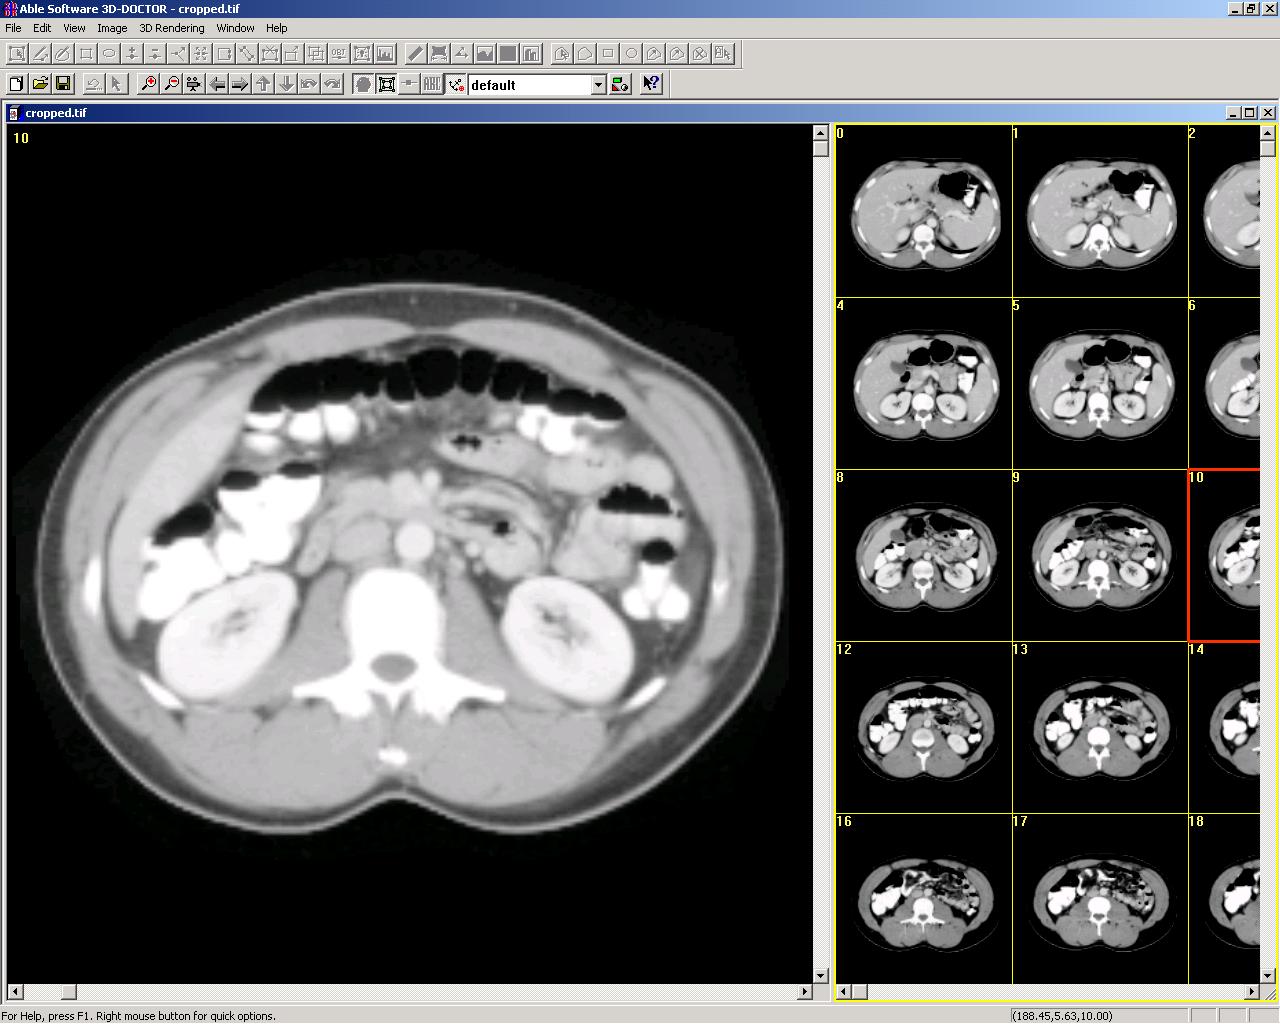
Cropped image:
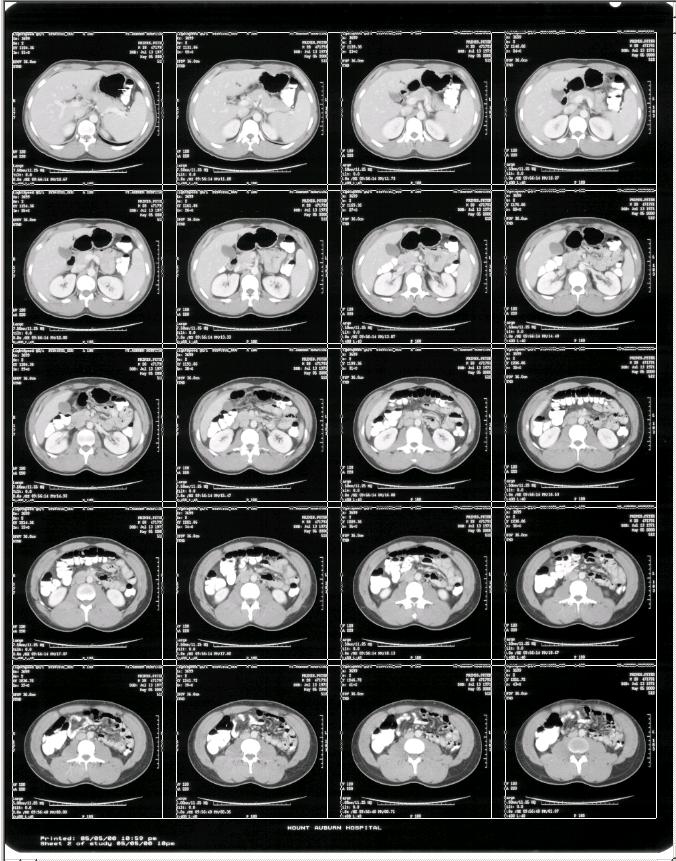
Crop Scanned Films:
Scanned films are cropped easily using 3D-DOCTOR's template-based "Crop Film" command.
Step 1. Scan your film, open it in 3D-DOCTOR.
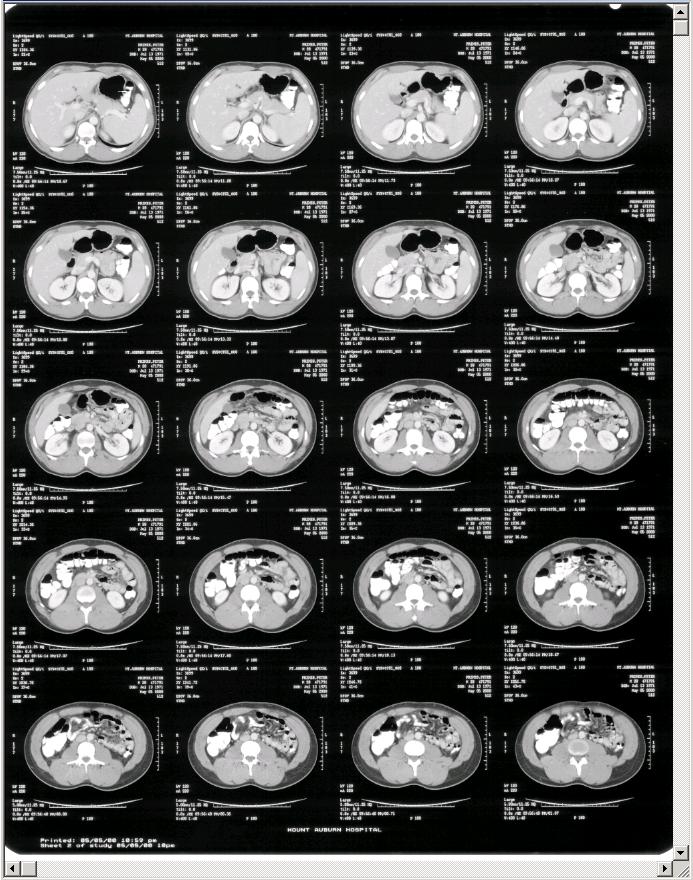
Step 2. Use the "Crop Film" command and adjust the template. You can use a predefined template as well.
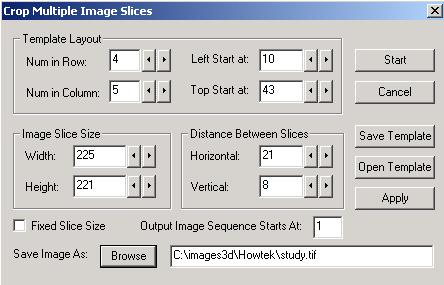
Step 3. Apply the template to crop the slices and save each slice into separate image file.
Step 4. Slices are put together in a stack using the "New Stack" command and ready for 3D modeling and visualization.
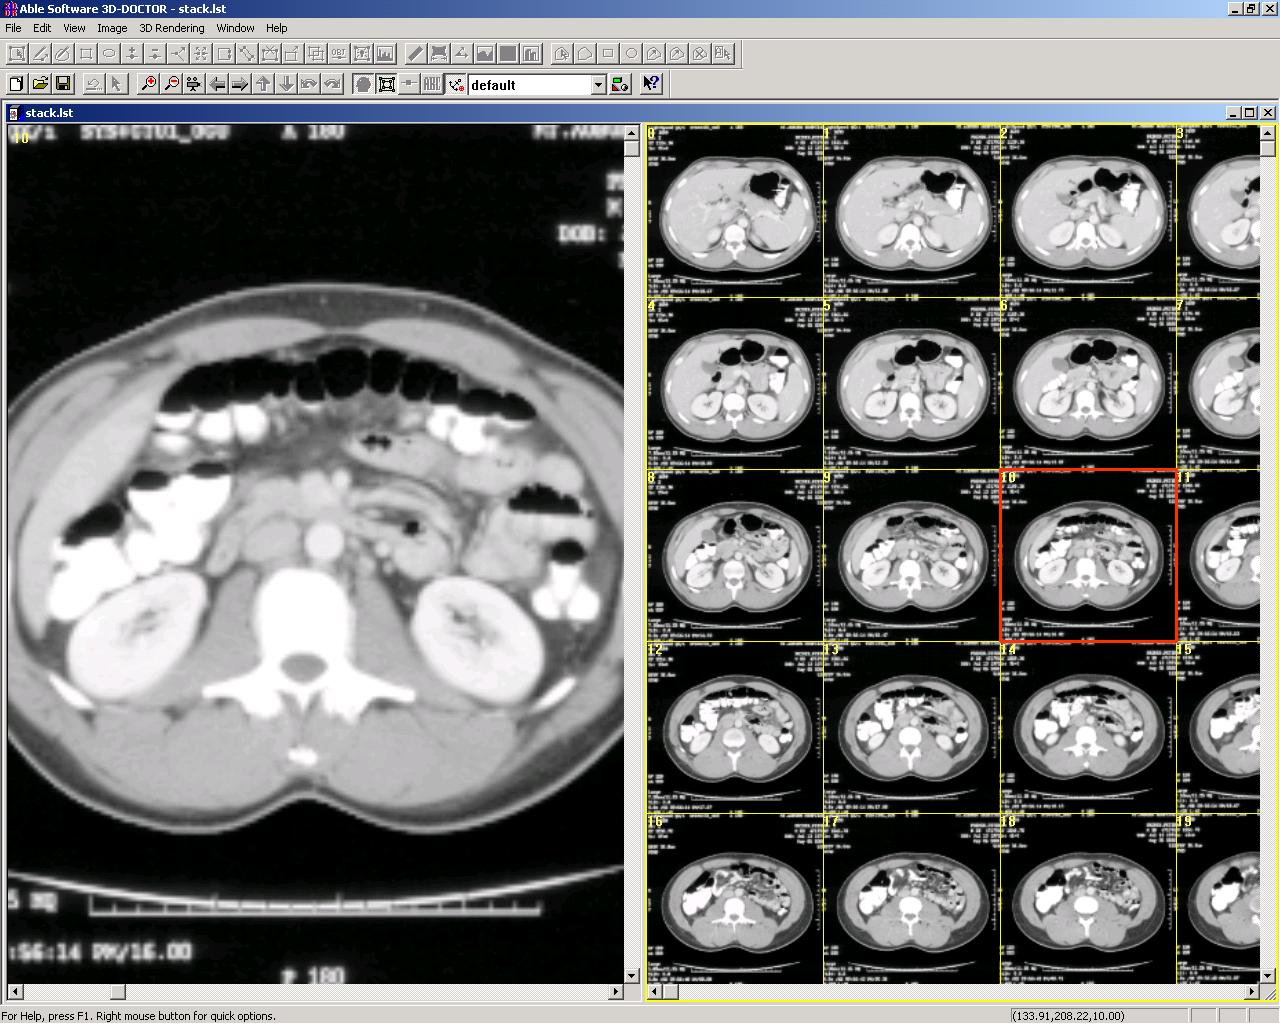
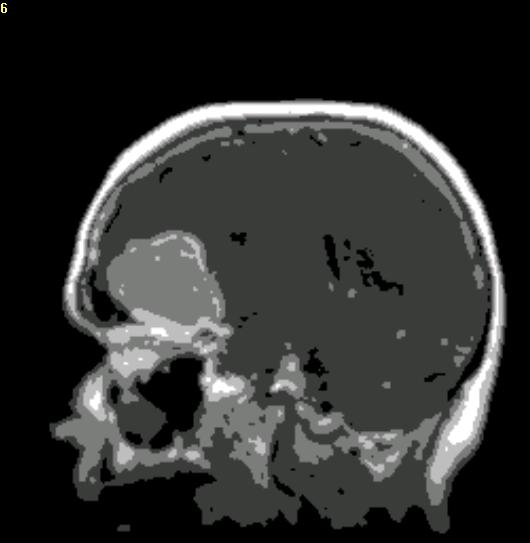
Image Classification
The classification function can group voxels of similar colors in either a grayscale image or a color image together for segmentation and other processing.
Original MRI image:
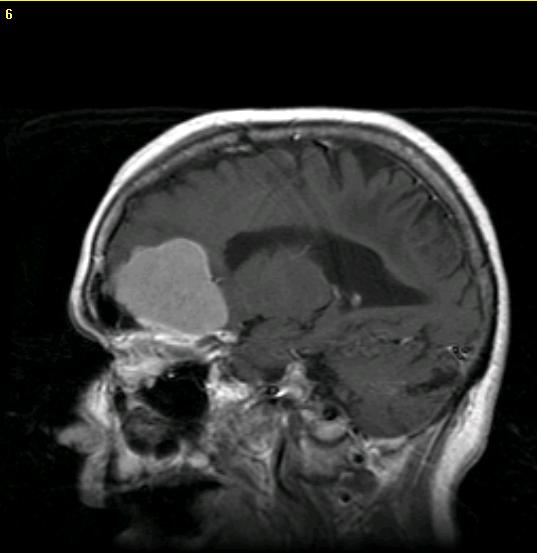
Classified into 5 groups using the Classification function: