3D Image Registration
Interactive Registration
With 3D-DOCTOR's interactive registration command, a source image can be registered against a target image of different or same modality.
An Registraion Example:
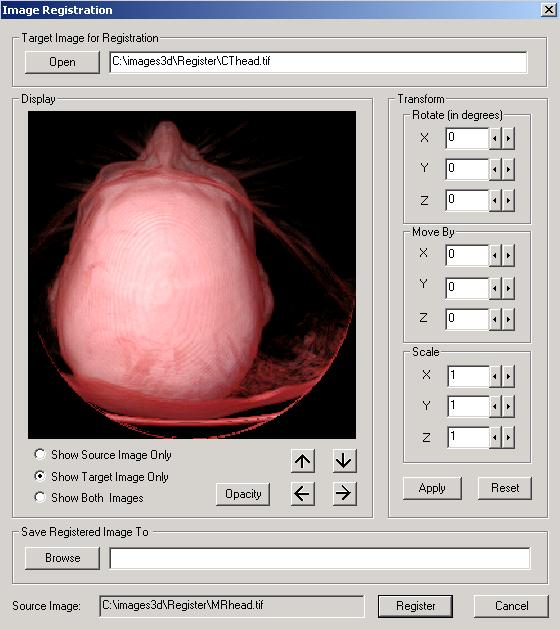
1. The original MRI image to be registered
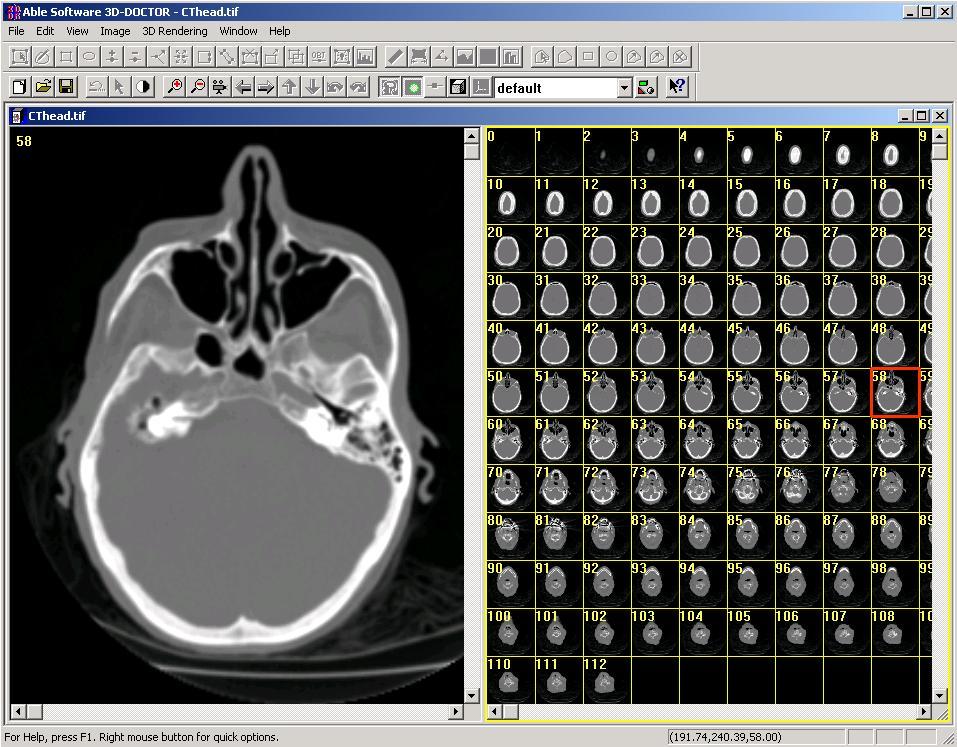
2. The target CT image
3. Starting the Register Image command, the two images are displayed together in 3D.
Source Image:
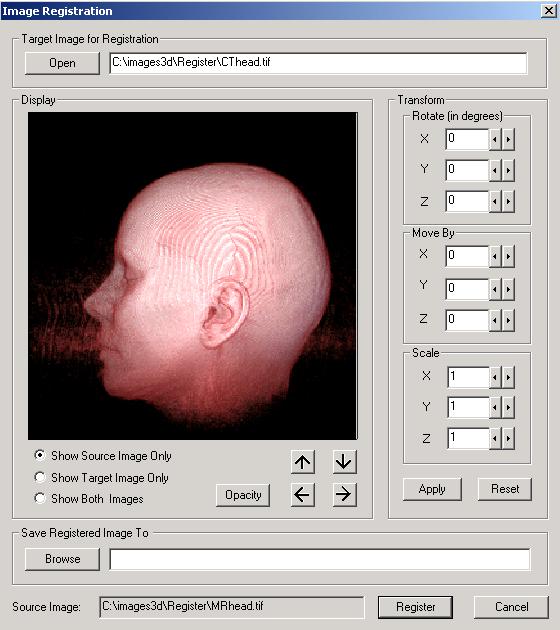
Target Image:
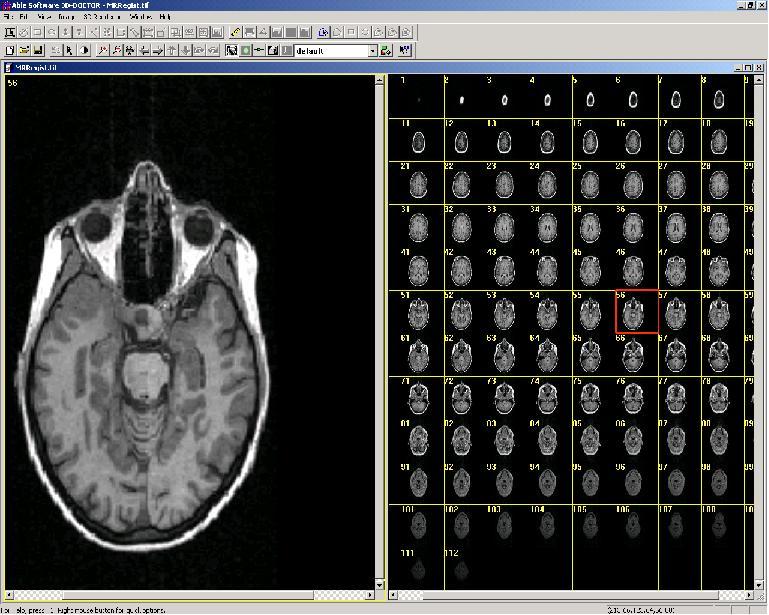
You can then adjust the orientation, location and scale until the two images are
registered. A new registered image is created and can be used for fusion and 3D
modeling applications: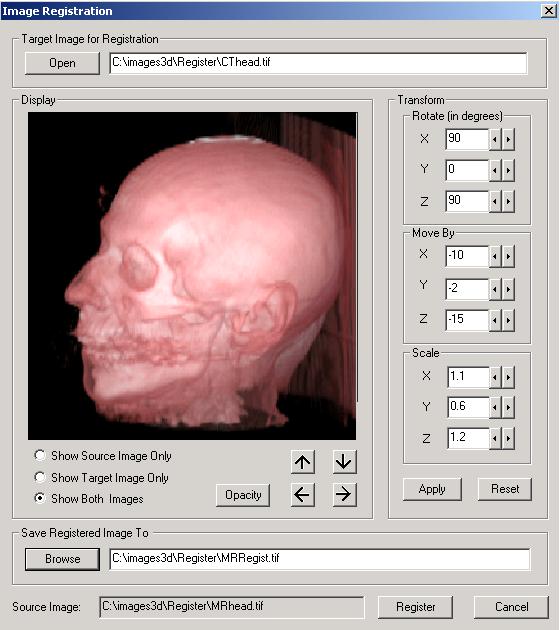
Registration By Control Points
Click here to watch a tutorial video clip for
registering two images. 3D-DOCTOR supports multi-modality image registration using user defined control points. Simply start 3D-DOCTOR's
Control Point Editor,
and enter 4 or more control points for the source image according to a target
image. Select Image/Registration to create the new registered image.
Stretching and reslicing are automatically done in the registration process. The
new image will be of the same orientation and scale and it can be fused with
the target image. If more
than 4 control points are given, 3D-DOCTOR will use the least square
method to generate an optimal mathematical transformation to map
the image to the new coordinate system.
3D Image Fusion
3D-DOCTOR provides several powerful image fusion functions to combine multi-modality images together for analysis and visualization. There are 3 types of image fusion functions: 1) Color Fusion: uses each image source as a color component (red, green, and blue) and creates a full color image as the result. 2) Focus Fusion: eliminates the problems of limited depth of field by automatically capturing the in-focus regions from a range of focal planes and combining them into a single fully-focused, high resolution image. 3) Fusion: combines two images with one of the mathematical operators: Add, Subtract, OR, AND, XOR, MAX, MIN, Transparent, etc. 4) Plane Fusion: combines image slices into a single slice image by using the average, minimum, or maximum method.
1) Color Fusion
The following shows some color image fusion examples using multi-modality image sources.
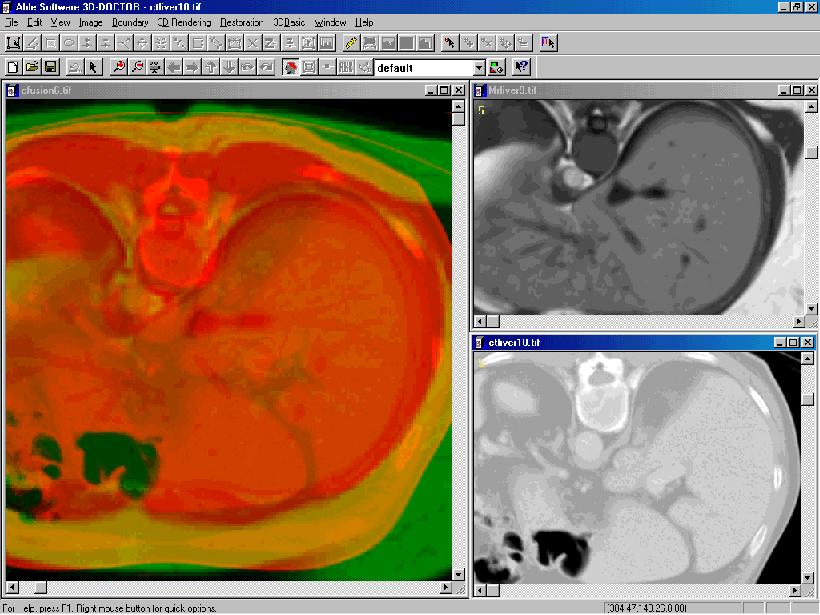
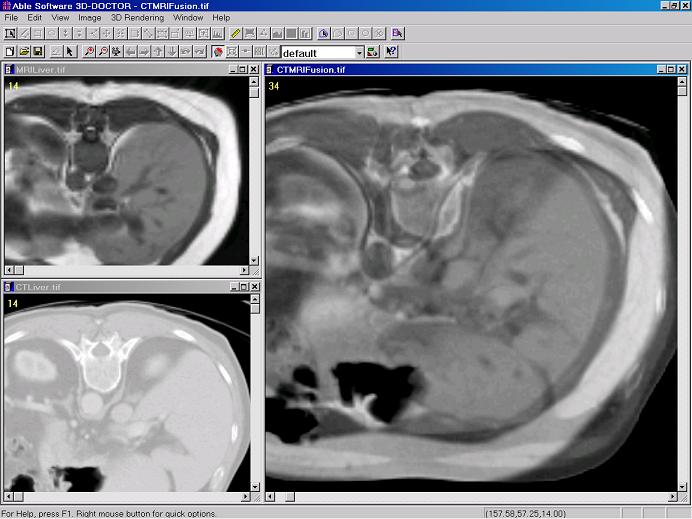
A. Image Fusion of CT and MRI Images
The color image window on the left is the fusion result created from the CT liver image and the MRI liver image. The CT image is used as the red color component and the MRI image as the green color component. A third image may also be used as the blue color component if available.
Commands used to create this fusion image:
- Register the MRI image against the CT image, so they both have same size and orientation.
- Open both images, adjust contrast to get the best display settings, use the "Image Conversion/Convert to 8-bit Grayscale" command to create new 8-bit images for both.
- Use the "Image/Fusion/Color Fusion" command to generate the fusion image. The MRI image is in the red channel, the CT image is in the green channel.
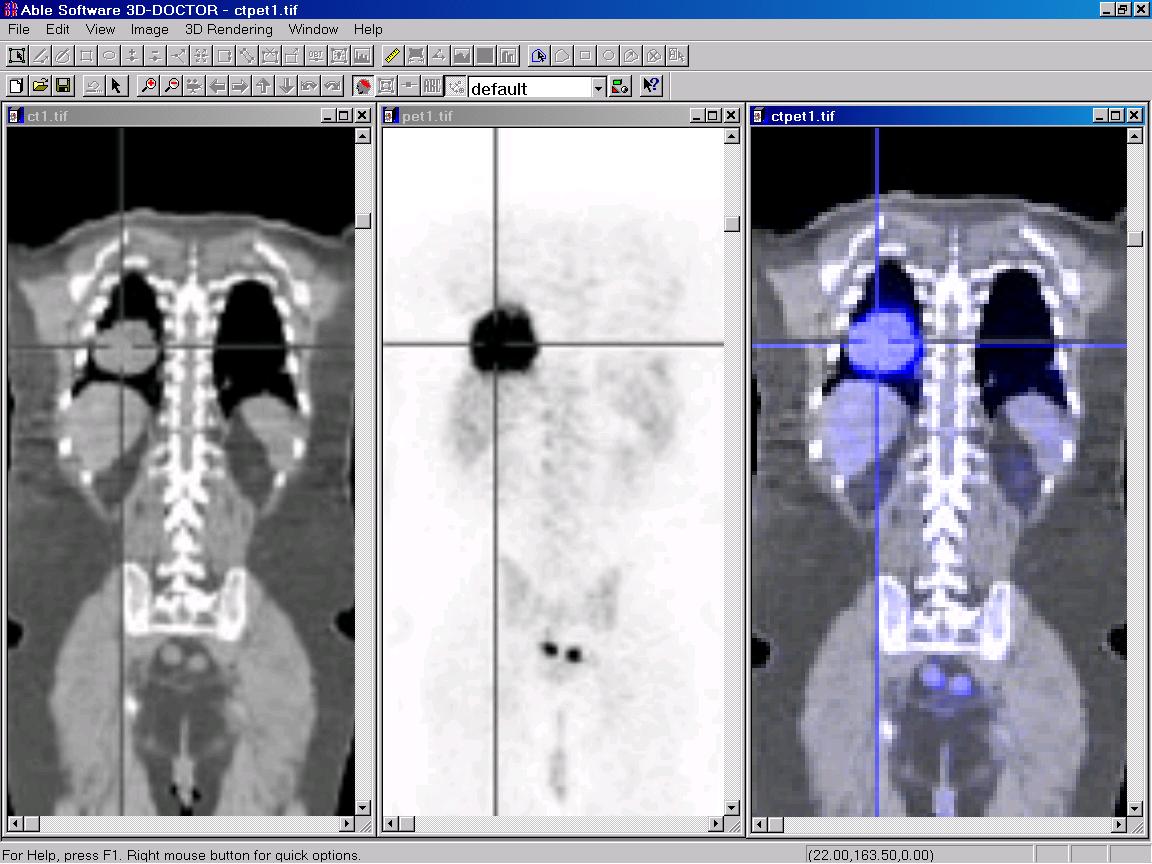
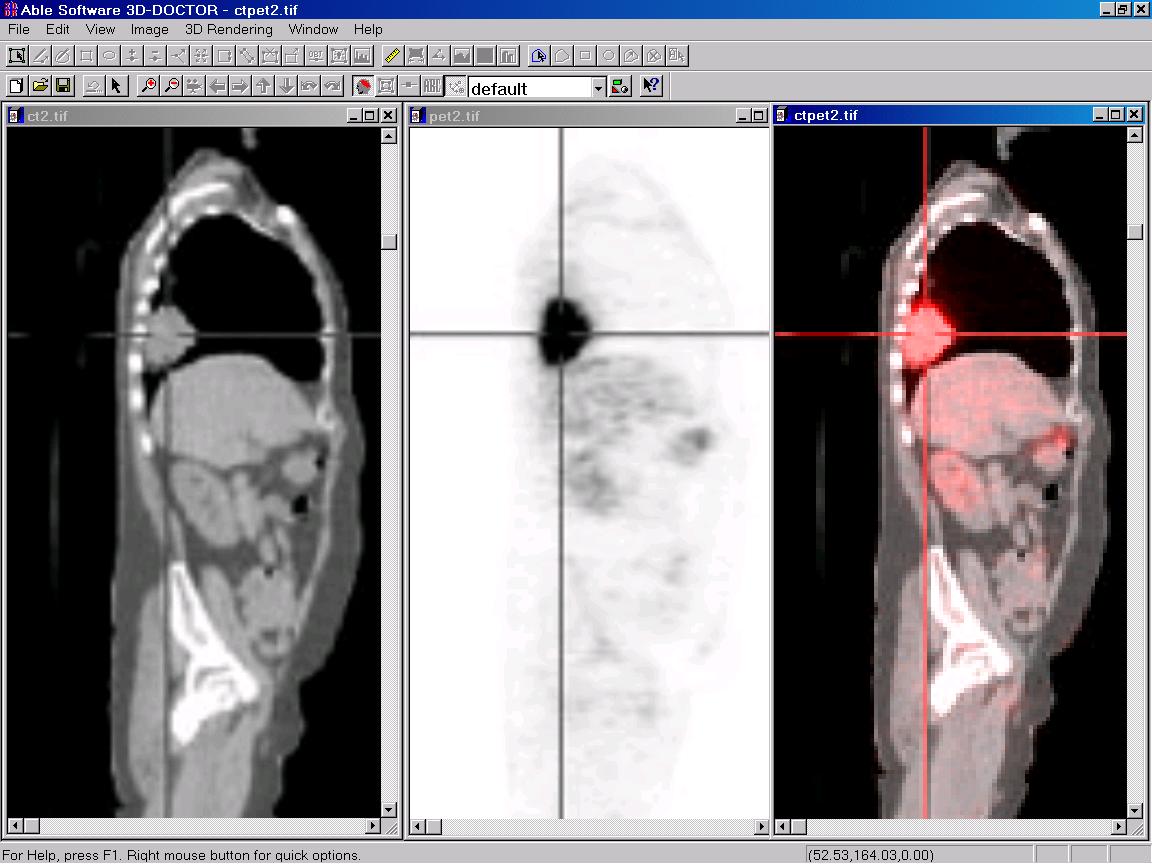
B. Image Fusion of CT and PET Images
The image on the left is a CT image. The image in the middle is a PET image. The image on the right is the fused image by using the CT as the background and the PET image as the blue color.
The image on the left is a CT image. The image in the middle is a PET image. The image on the right is the fused image by using the CT as the background and the PET image as the red color.
2) Focus Fusion
Focus Fusion uses a proprietary image processing algorithm developed by Able Software to eliminate the problems of limited depth of field by automatically capturing the in-focus regions from a range of focal planes and combining them into a single fully-focused, high resolution image. No knowledge with your image acquisition system is required for this processing.
3) Fusion
Two registered images can be combined to create a fusion image. This is often used to combine two images acquired differently but from a single source to enhance the display of various materials or tissues. For example, a CT image and an MRI image from the same patient can be combined to show both bones and fat clearly in a single image. Much more information can be visualized in the combined image than from the individual ones.
This picture shows the final image created from the fusion command.
4) Plane Fusion
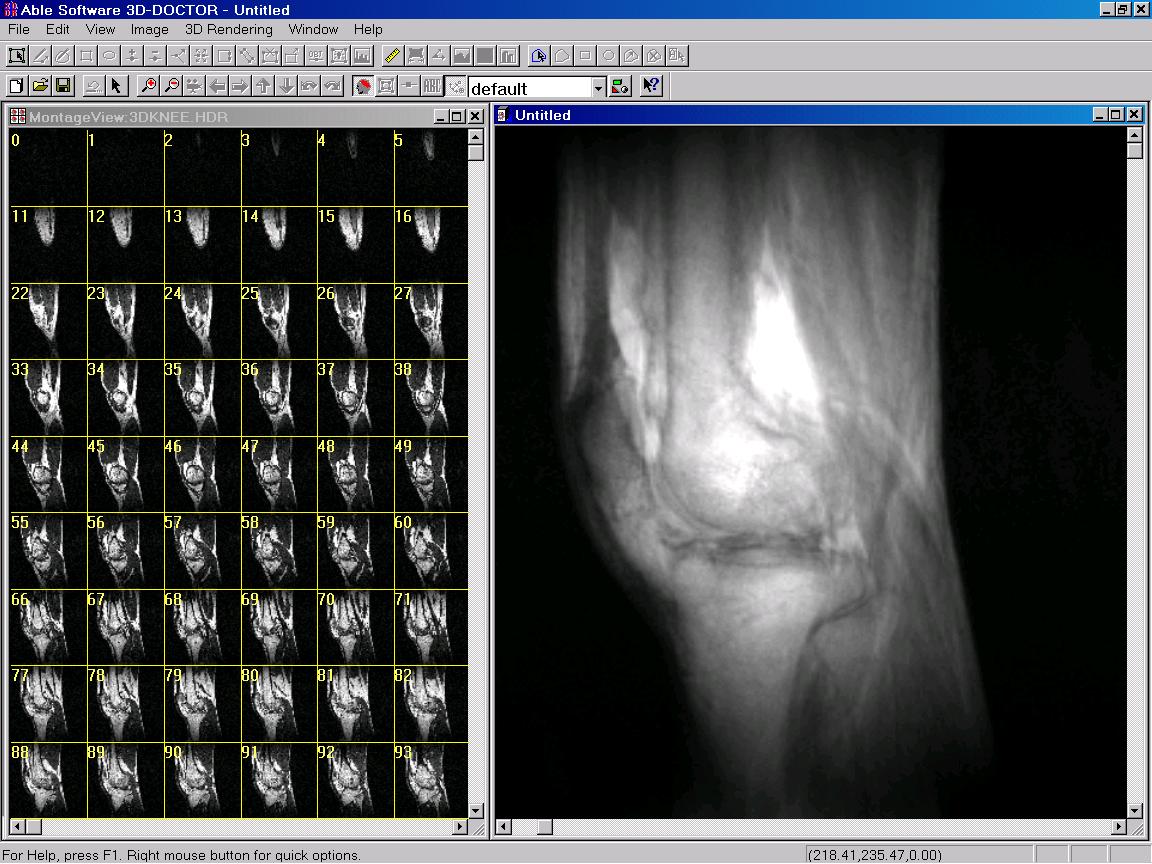
You can combine multiple image slices into a single slice image using one of the methods: minimum, average and maximum. The following example shows the fusion image of a MRI knee image. The window on the right is the fusion image by taking average of all slices. The window on the left is the original image slices: